Configuring Automated Emails
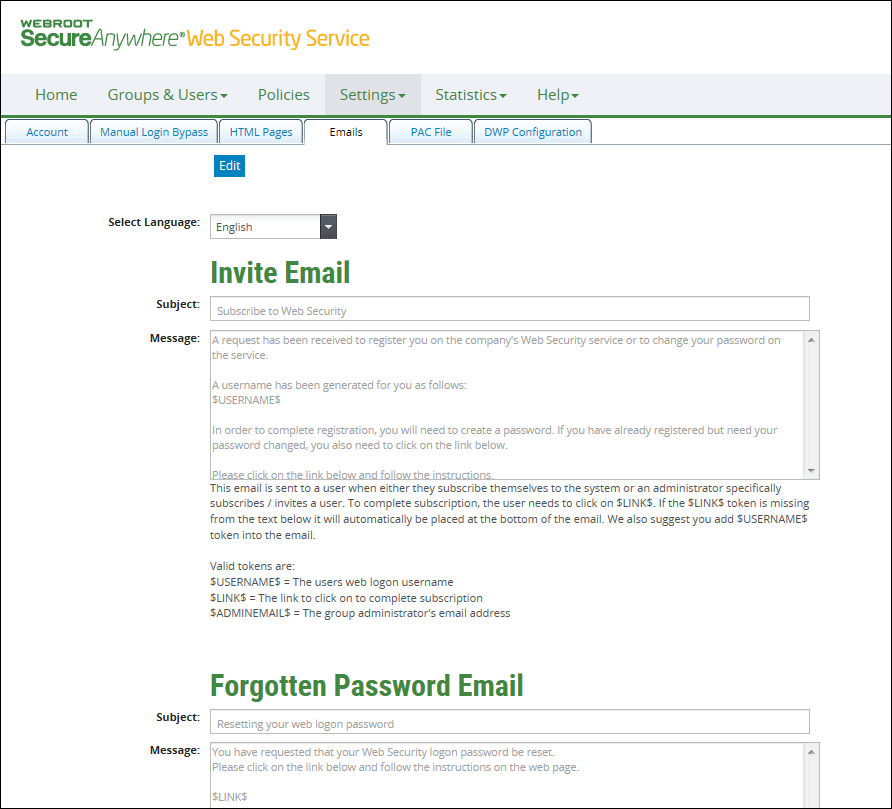
The Emails subtab contains the default email messages that provide these services to users:
- Select Language: Specify the default email language for invitation emails to users that you create under this account.
- Invite Email: Users receive this email if a Customer Admin added them to the Web Security Service and selected the option to send an invitation. The message includes a URL link, which users click to set their own passwords. This link expires after 7 days. If the link expires before a user registers, the Admin needs to send another invitation.
- Forgotten Password Email: Users receive this email if they click the Forgotten Password button on the login page to the Web Security Service.
- Quota Block Email: Group administrators receive this email under these conditions:
- The group's policy includes quota limits, and the email notification option is enabled; and
- Users are blocked because any one of the limits specified in that user's quota has been reached. The email provides the groups, user names, and the specific quota type whose limit was reached.
The Web Security Service polls for blocked users every ten minutes, then sends the email notification on a batch of blocked users to respective group administrators.
To edit the email text:
- Select the Accounts tab and click Edit.
- Select the Emails subtab.
The Emails subtab opens.

This tab gives you a choice of language for emails, shows the default message text, and provides information about the tokens used in the messages. When the user reads the message, the tokens are replaced by the actual values stored for the account in the Web Security Service database.
- Choose the email language from the Select Language drop-down list.
- Click in the text box that contains the default message text for the email message.
- Select some text and replace it with your own.
Be cautious about deleting the tokens embedded in the message, because they display essential information to the user.
- Click Save.
To restore the default text:
- Select the Accounts tab and click Edit.
Note: Restoring to the defaults affects all pages.
- On the Emails subtab, scroll to the bottom of the page and click Reset.
This button is not available in View mode.
- Click Save


