Website / Email / DNS Management

This is your Online Presence Platform login. Once signed in you will have access to tools for building your website, administering your email, and configuring your DNS. Please login to the left.


Online Email Access

Use the fields to the left to sign into your email online. Here you can access your messages where ever you are. All you have to have is internet access.


Online Fax to Email Access

Away from your office but still need to send a fax? This is the place for you! Sign in with your fax number and password.

What would you like to log in to?

 My Services  Outlook Web Access

Choose a type

Public or shared Private computer

Contact

support

800.316.4581

sales

855.209.1839

Related Items:

Admin Login

Proofpoint Guides

Important Dates
Nov. 14, 2016
All Accounts Mapped
Jan. 11, 2017
MacAfee End Of Life
  • Proofpoint Domain Verification
  • Setup Information

    Step 1: Login Information

    ***IMPORTANT***

    After logging into Proofpoint, please Change Your Password immediately. To change your password, select your name in the upper right corner of the interface. From the drop menu select 'Profile'. Change your password and 'Save'.

    Step 2: Getting Started

    Step 3: Proofpoint IP Range

    To ensure all messages filtered by Proofpoint are delivered to your mail server please add the following list of IPs prior to redirecting your MX records.

    • 67.231.152.0/24
    • 67.231.153.0/24
    • 67.231.154.0/24
    • 67.231.155.0/24
    • 67.231.156.0/24
    • 67.231.144.0/24
    • 67.231.145.0/24
    • 67.231.146.0/24
    • 67.231.147.0/24
    • 67.231.148.0/24
    • 148.163.128.0/19

    Step 4: Redirect MX Records

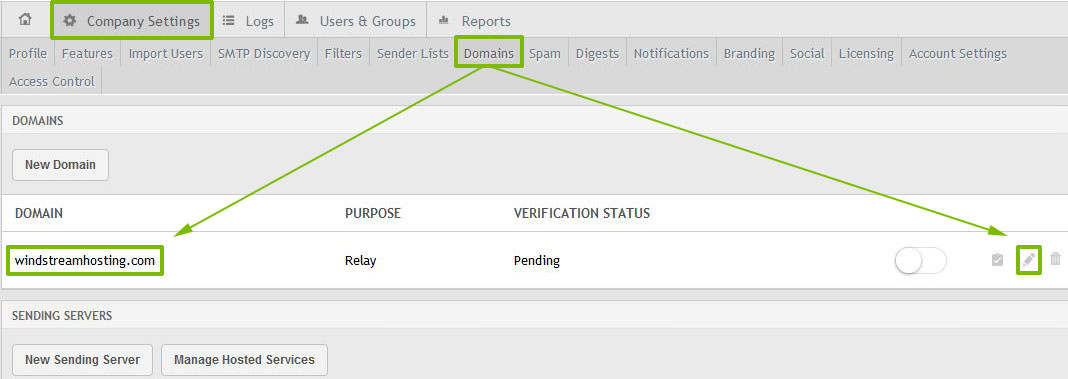
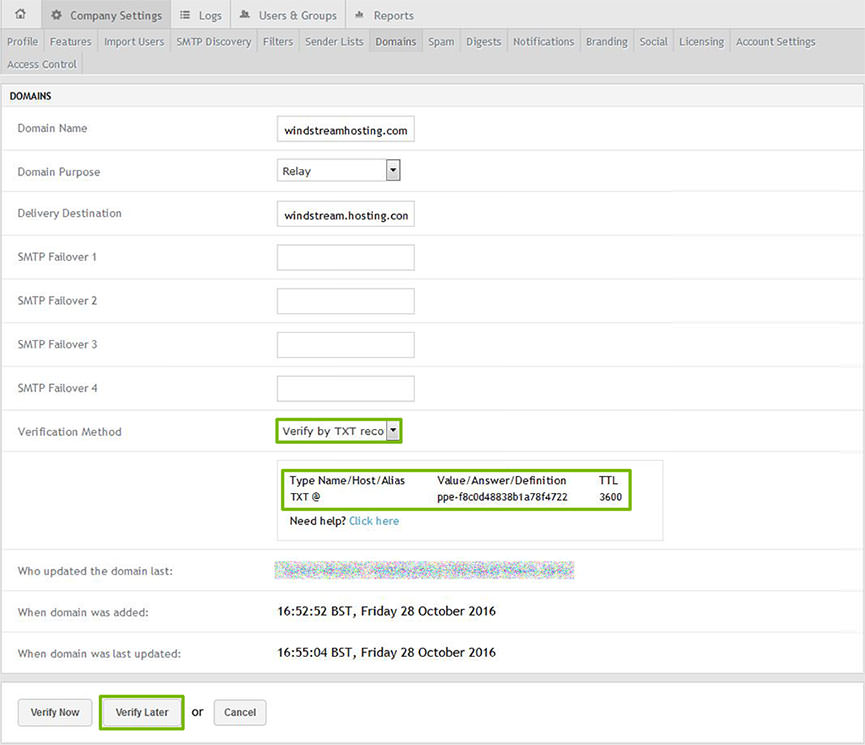
    In order for inbound messages to be filtered, the DNS MX (mail exchange) records must be properly configured.

    Hostname

    mx1-us1.ppe-hosted.com

    mx2-us1.ppe-hosted.com

    Preference

    10

    20

    Step 5: Configuring Outbound Filtering

    By configuring outbound filtering with Proofpoint, your mail will be sent from a safe and reputable IP. You must have control over your outbound mail to configure outbound filtering.

    Outbound Smart Host: outbound-us1.ppe-hosted.com

    SPF Record: 'v=spf1 a:dispatch-us.ppe-hosted.com ~all'

  • Documents and Guides
  • Navigating the Interface

    Account Setup

    Account Setup

    Profile
    Use this screen to update your personal information.

    Aliases
    This screen will list all known aliases associated to your profile.
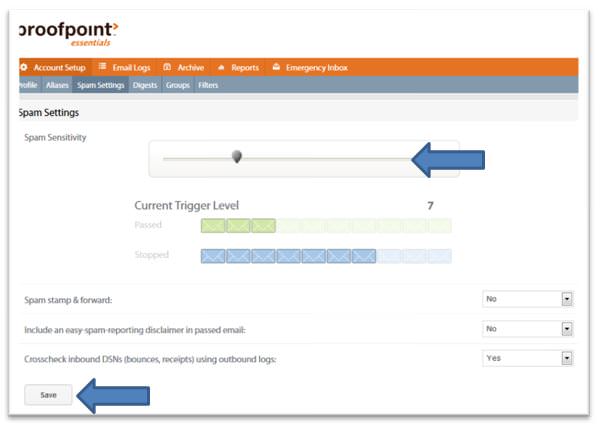
    Spam Settings
    End-users can adjust their own spam settings. It is highly recommended you leave the settings as they are. These settings are managed by your administrator.
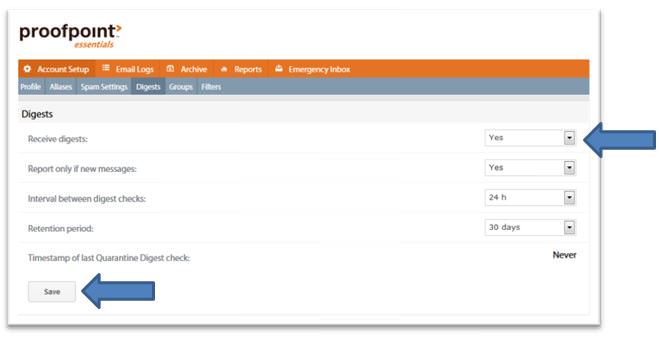
    Digests
    As an end-user you are likely currently receiving daily digests summarizing daily email activity and providing you with a list of all quarantined emails you have received. This screen allows you to adjust your personal digest settings.

    Receive Digests > Use this option to enable/disable digests.

    Report only if new messages > Use this option to only send out digests if new mail has been received.

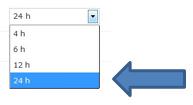
    Interval between digest checks > Use this option to choose the frequency of digest delivery

    Retention period > Use this option to choose how long mail will remain in the quarantine

    Timestamp of last Quarantine Digest Check > The timestamp of the last digest delivered to you

    These settings have been defined by your administrator. Changes made will apply to you directly. The administrator can reset these settings back to their defaults as needed.

    Groups
    This screen will list all known groups that you are a member of.
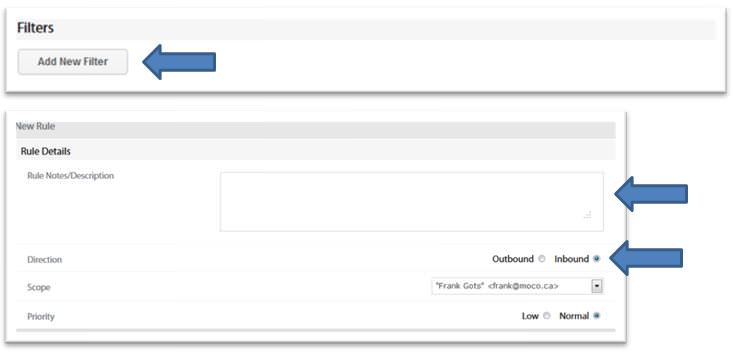
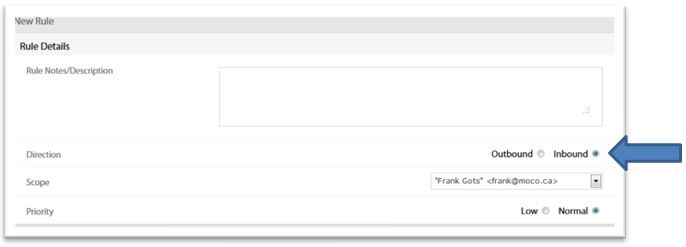
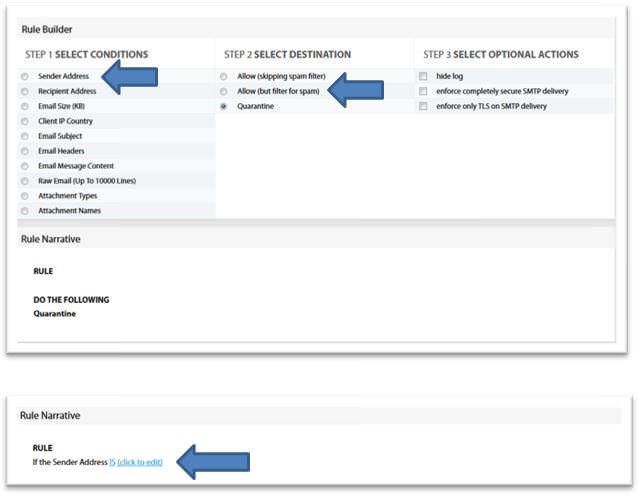
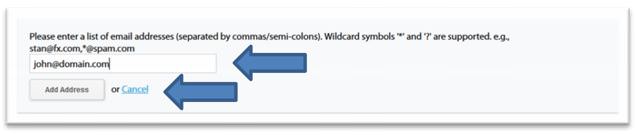
    Filters
    Filters can be created to block or allow certain domains or email addresses.

    Email Logs
    Email logs allow the user to view all email sent or received by category (any, Quarantined, blocked, etc.) and by date.

    Archive
    Archive is an optional feature that your company may not be using. It is not covered in this section.
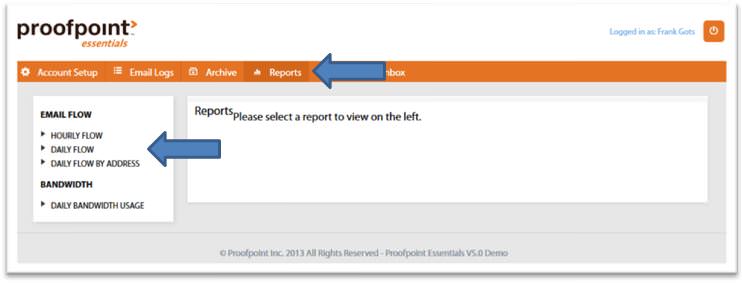
    Reports
    You can view a report on email activity by hour or by day for the last five days.

    Emergency Inbox
    Emergency Inbox is an optional feature that your company may not be using. It is not covered in this section.

  • How Does ProofPoint Essentials work?
    The message filtering service lets a company easily provide real-time spam and virus filtering, attack blocking, and email traffic monitoring across a user deployment of any size. Users receive comprehensive protection against unwanted and malicious email, while administrators can easily tailor service for users' needs and policies.
    The service blockes a wide range of email attacks at the connection level, filters spam and viruses, and can approve, block messages based on sender address or domain, origin IP address, attachment size or file type, text content, and more. Incoming user email is processed at our highly secure and reliable data center before reaching your messaging environment. Within seconds, spam and viruses are separated from legitimate messages. Legitimate messages are delivered to recipients with minimal delay, while suspicious messages are deleted, or sent to a quarantine area where you have the option to review or release them to the user.
  • How do I change my password?
    When you login you will see your user profile.
    1. Type in your new password in the Password field.
    2. Type in the new password in the Retype Password field.
    3. Click Save.
  • Can I change my spam settings?
    Yes. You can change your personal spam settings. Your administrator has configured the service to apply to all users. Therefore, it is recommended you check with your administrator before making changes.

    To change spam sensitivity:
    1. Login to Proofpoint Essentials.
    2. Click on Spam Settings.
    3. Adjust the Trigger Level by sliding the control left (more aggressive) or right (less aggressive).
    4. Click Save.
    Spam Settings

    There are additional options available to end users. It is not recommended that you change these settings.

  • Can I disable my digest?
    Yes. You can choose to stop receiving your digests.

    To disable your digest:
    1. Login to Proofpoint Essentials.
    2. Click on Digests.
    3. Select No from the drop-down option next to Receive Digests.
    4. Click Save.
    Spam Settings
  • Can I change the frequency of my digest delivery?
    Yes. You can change the frequency with which you receive the digest.

    To change the frequency:
    1. Login to Proofpoint Essentials.
    2. Click on Digests.
    3. Choose the appropriate interval from the drop-down option next to Interval between digest checks.
    4. Click Save.
    Spam Settings
  • What options are available within a digest?
    When you receive the daily digest, you have two options:
    1. Release once: This will release the message but not white-list the sender
    2. Release always: This option will release the message and white-list the message sender in the future
  • How do I block an email address from sending me an email?
    Yes. You can change the frequency with which you receive the digest.

    To change the frequency:
    1. Login to Proofpoint Essentials.
    2. Click on Filters.
    3. Click Add New Filter.
    i. Enter a name for the filter(i.e., Block email from john@smith.com)
    ii. Select Inbound
    Filter Settings
    iii. Under Rule Builder:
    - Select Sender Address
    - Select Quarantine
    Filter Settings
    iv. Under Rule Narrative
    - Select 'click to edit'
    - Enter the email address you wish to block (i.e., john@smith.com)
    v. Click Save Filter
  • How do I allow an email address to send me an email?
    1. Login to Proofpoint Essentials
    2. Click on Filters
    3. Click Add New Filter:
    i. Enter a name for the filter (i.e., Accept email from jane@smith.com)
    ii. Select Inbound
    Rule Settings
    iii. Under Rule Builder:
    - Select Sender Address
    - Select Allow (but filter for spam)
    Rule Settings
    iv. Under Rul Narrative
    - Select 'click to edit'
    - Enter the email address you wish to accept (i.e., john@smith.com)
    Rule Settings
    v. Click Save Filter
  • How do I disable a filter?
    1. Login to Proofpoint Essentials.
    2. Click on Filters.
    3. Click on Disable next to the filter in question.
    Disable a filter

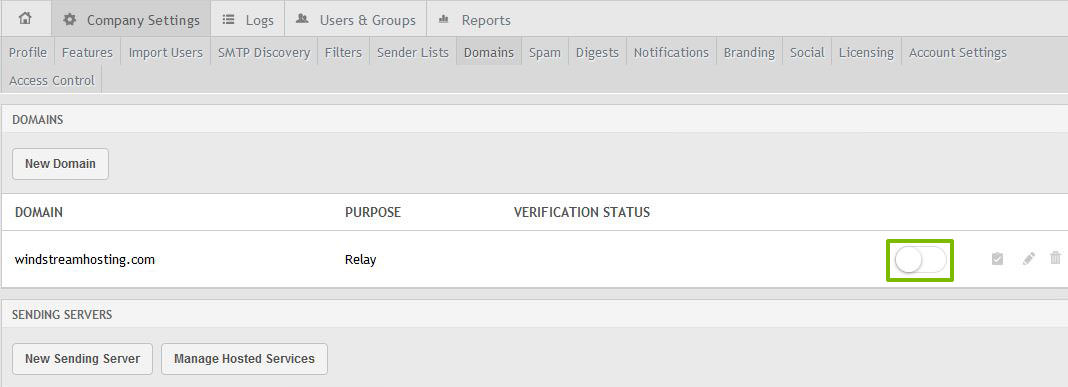
    This will disable the filter. It can be re-enabled when needed.

  • How do I delete a filter?
    1. Login to Proofpoint Essentials.
    2. Click on Filters.
    3. Click on Delete under the actions list for the filter in question.
    Delete a filter
  • How do I modify an existing filter?
    1. Login to Proofpoint Essentials.
    2. Click on Filters.
    3. Click on Edit under the actions list for the filter in question.
    Edit a filter
  • Can I locate an email that I sent or received?
    Yes. You can use the email logs functionality within Proofpoint Essentials to locate an email you sent or received in the past five days. This can be helpful to locate a message you may have deleted or filed away. You have the option to:
    - Resend the email to your Inbox*
    - Release an email from your quarantine
    - Classify as spam
    * Must be licensed on the business or professional package.
  • Are there any reports I can use?
    Yes. You can access reports on the following:
    - Hourly Flow (Inbound and Outbound)
    - Daily Flow (Inbound and Outbound)
    - Daily Flow (by Sender/Recipient Address)
    - Daily Bandwidth
    Reports