
Additional Information:
Guide Sections:
Downloads:
This Document
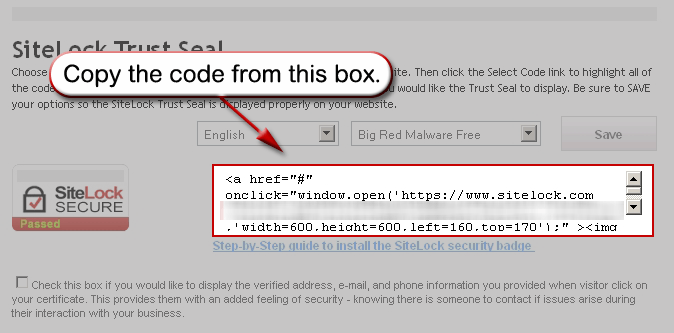
On the SiteLock screen, scroll to the bottom of the page and you will see a SiteLock Trust Seal and the HTML code for the customer to use on their site. Copy the code for later use.
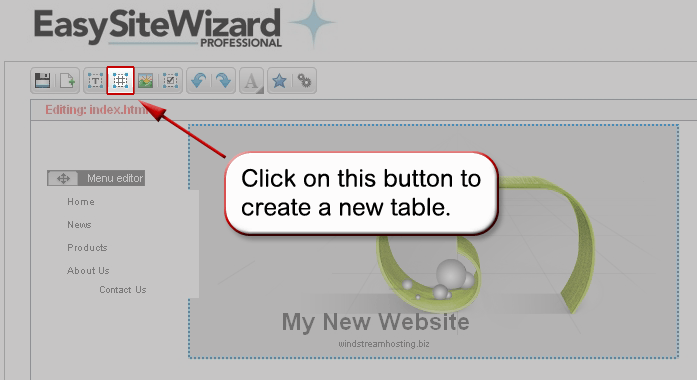
You can now exit the SiteLock control panels and login to the Windstream Hosting control panel. Open the EasySiteWizard Pro and select the option to edit the site that the customer wants this on.
You can now exit the SiteLock control panels and login to the Windstream Hosting control panel. Open the EasySiteWizard Pro and select the option to edit the site that the customer wants this on.
Click the button at the top to create a new table.
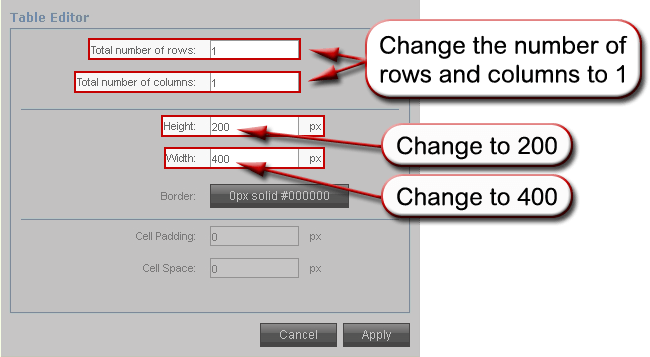
We want to use custom settings for this. Use the same settings from the screenshot below.
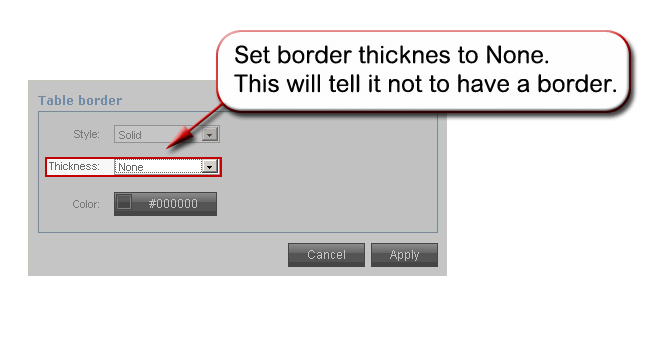
Set the border Thickness to 'None' to eliminate the border. Click Apply on the border screen, then Apply on the table screen.
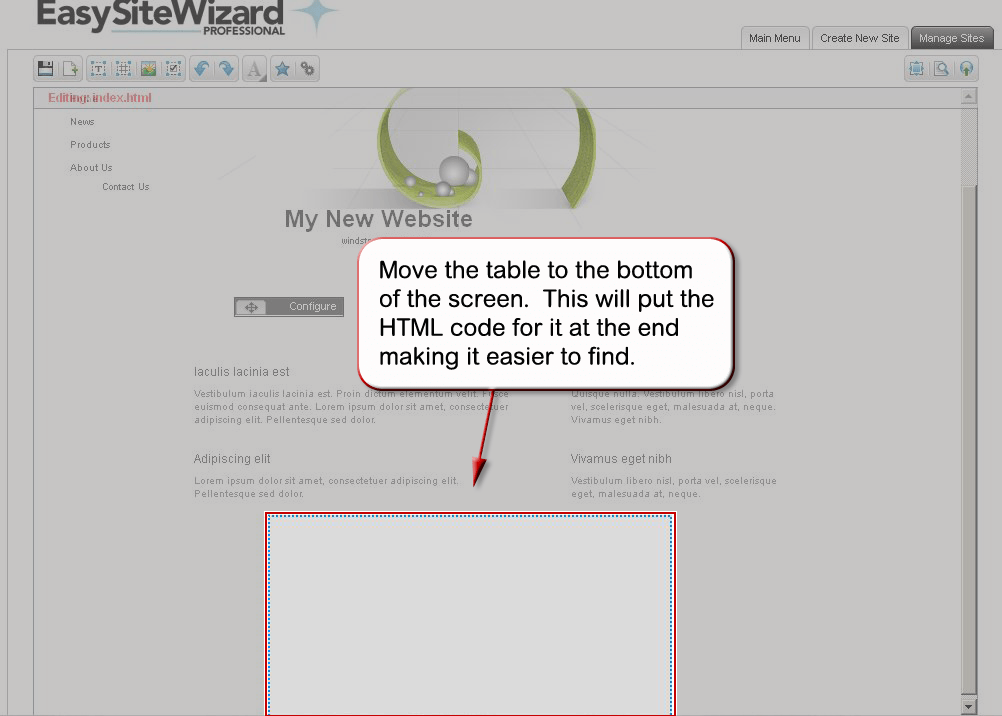
Once you're back to the editing section you will see your new table. Move the table to the bottom of the screen. This will put the HTML code for it at the end of the source code, making it easier to find.
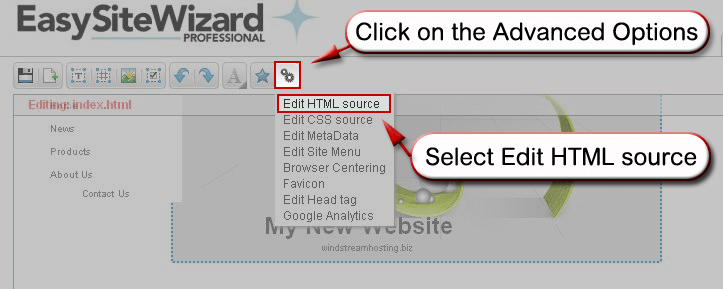
Now go up and select 'Advanced Options' and then 'Edit HTML source'.
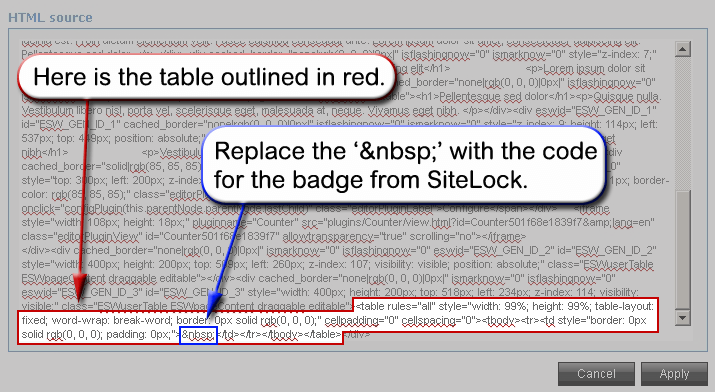
Follow the instructions in the next screenshot to find and replace the necessary code. When finished with that, Apply the change.
You will now see the SiteLock Trust Seal inside of the table you created. From here you can easily move the badge to where you want it to be on the site.

 Available formats: